![]()
![]()
Before Editing a Coverage, please verify that the change should be made to the Coverage, and not another object (e.g. Driver, Unit).
1. Navigate to the Coverage.
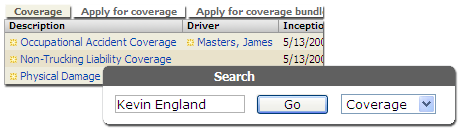
Locate the Coverage by navigating to the Unit it is associated with, or using Search.
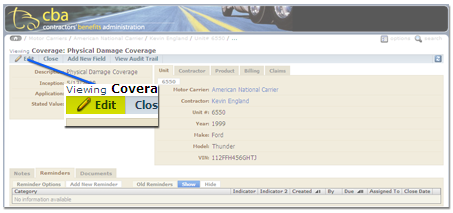
2. Click the Edit button.
3. Edit the Coverage information and click the Update button.
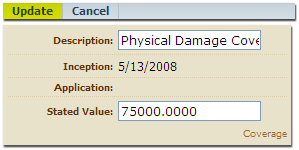
Enter the new Coverage information and click Update to launch the Coverage Update Wizard.
4. Select an effective date for your changes.
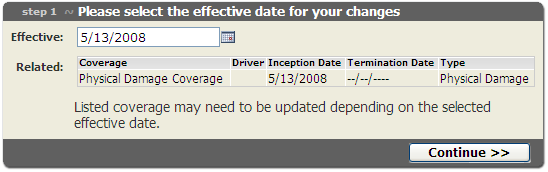 Review the Coverage related to your changes. Enter an effective date and click Continue >>.
5. Select how you would like your changes to affect existing coverage items.
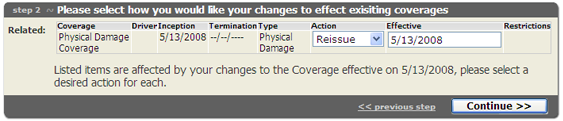
Review the list of Coverages (if any) that will be affected by the move, and choose the appropriate action.
![]()
If you are unsure which action to use, please contact an administrator, or click the link below for more information.
![]() Coverage Update Actions
Coverage Update Actions
Enter an effective date for the Coverage update(s), and click Continue >>.
6. Click Finish >>.

7. Review the Coverage Edit.
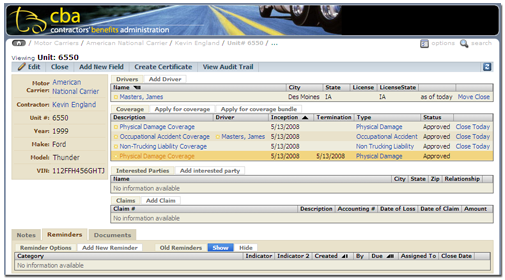
You will be taken to the Unit page. Please verify the Coverage edit information.
![]() If Coverage was updated using Reissue or Terminate, the Unit page will show an inactive Coverage items. For more information on lifecycle and associations, click the link below.
If Coverage was updated using Reissue or Terminate, the Unit page will show an inactive Coverage items. For more information on lifecycle and associations, click the link below.